FAQ: What to know about the new Notch Flow Rope Wrench
At Notch Equipment, we introduce new products when we think we can bring something to the market that can improve an arborist’s experience or safety. That’s why we’re excited about the new Notch Flow Rope Wrench — it’s the first adjustable-friction rope wrench on the market, and it gives arborists more flexibility to work how they want to work. Even better, we were able to partner with the creator of the original rope wrench, Kevin Bingham, to develop this new take on the rope wrench.
We think you’ll like what this tool provides: With the Notch Flow Rope Wrench, any climber can customize, and optimize, the friction of their rope wrench to meet their personal preference, weight, hitch cord, climbing style, and rope size and type.
Because the Notch Flow Rope Wrench is the only one of its kind, we’re sure you have questions on how to set, use, and care for it. Check out the FAQ below for the answers you need. And be sure to check out the Flow Rope Wrench!
Q: What’s this device for?
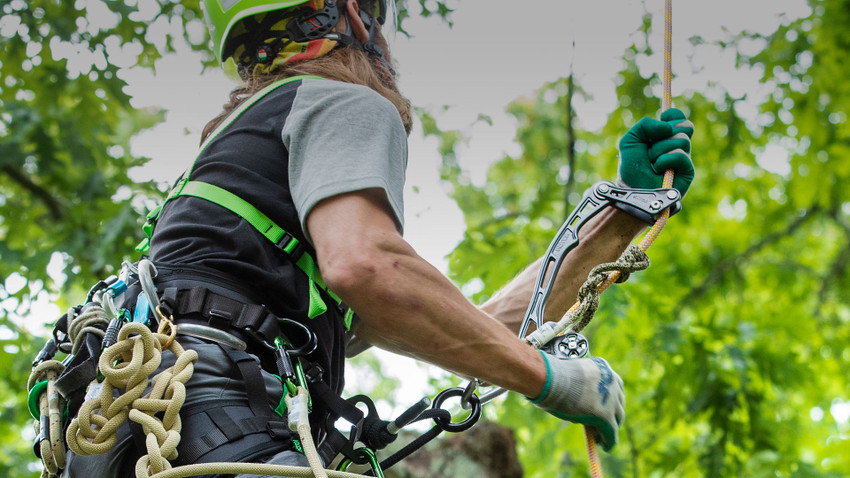
A: A rope wrench is an essential item in a hitch based Single Rope System (SRS), allowing the climber to add friction to the rope when descending to easily control the rate of descent. The Notch Flow Rope Wrench allows the climber to adjust the amount of friction provided by the rope wrench to match the diameter of their rope and their personal preference. Pair the Flow with our Fusion Tether, and you have the ultimate SRS system.
Q: Why create an adjustable rope wrench? What problem are you trying to solve?
A: Remember, when you’re ascending, friction is the foe, and when you’re descending, it’s your friend. We wanted to create a tool that would give climbers more control over the amount of friction produced by the rope wrench they’re using.
Before the Notch Flow Rope Wrench, all the wrenches on the market were non-adjustable. The Notch Flow Rope Wrench lets you adjust the amount of friction to match your preference and rope diameter.
Q: What’s the best use case for the Flow Rope Wrench?
A: The Notch Flow Rope Wrench should be considered to be part of an auxiliary friction control system which primarily relies of the friction hitch (cordage) as the life support component.
Q: Do I need any special products to use this wrench?
A: Yes. You’ll need a high-quality 5mm hex wrench to tighten the bollard to the recommended 8Nm of torque. Loctite Threadlocker Blue 242 should also be applied to the threads to ensure the bollard remains firmly secured.
Since the bollard requires tightening from each side, it’s imperative to maintain the same friction adjustment setting. Both sides are marked with 1 to 5 friction settings; the adjustment bollard must be on the same number on each side. We recommend starting in the “1” position and adjusting accordingly.
Q: What Notch products does the Notch Flow Rope Wrench pair well with?
A: We recommend using the Notch Fusion Rope Wrench Tether — and we’re selling the two together in a kit called the Notch Fusion Flow: Flow Rope Wrench Fusion Tether Combo. That said, the Notch Flow Rope Wrench is compatible with all types of tethers on the market.
Q: How do I install the Notch Flow Rope Wrench to a tether and a rope?
A: Because of the adjustable bollard, the Notch Flow Rope Wrench requires a different tether installation method than you might be used to. There are three components that need to be removed/loosened prior to installation:
1. Tether Attachment Bolt
2. Slic Pin
3. Adjustment Bollard Bolt
Installing the Tether
- Remove the Tether Attachment Bolt. This allows you to connect the wrench to the tether (this is the same process as the current ISC model
- Remove the Slic Pin
- Loosen the Adjustment Bollard (this is the big change when installing tether). The bollard does not need to be completely removed; loosen it enough for the side plates to rotate. Do not attempt to rotate the sideplates using force.
- Install the tether onto the Tether Attachment Point
- Once the tether is installed, rotate the sideplates closed then reinsert and resecure the above components
Installing the Rope
- Open the slick pin by pushing it through one of the side plates, taking care to leave it inserted through the remaining side plate.
- With the Flow Rope Wrench pointing up, insert climbing rope between the slick pin and the adjustable bollard
- Close and secure the Slic Pin by pressing the pin through the side of wrench.
- Ensure the Slic Pin metal tab clears the outside of the second side plate
You can also watch our installation video:
Q: How often should I change the friction setting on my Notch Flow Rope Wrench?
A: The Flow is adjustable, but once installed on the rope, the wrench should not require readjustment. Adjusting the friction setting is appropriate when changing to a new rope or if a rope is particularly old and no longer responsive at the current friction setting.
Q: How easy is this product to use?
On a scale of 1 (very easy) to 5 (difficult, takes practice and calibration), this product is a 2. Once installed, it works like any other rope wrench.
Q: How should I store or care for the Notch Flow Rope Wrench?
A: The wrench requires very little maintenance. Keep it clean from debris with the use of compressed air and/or soap and water.
Q: What ropes are compatible with the Notch Flow Rope Wrench?
A: Arborist grade ropes with a diameter between 11-13mm which meet the ANSI Z133-2017 standard.
Q: Is Notch Flow Rope Wrench CE certified?
A: No, the Flow alone is not CE certified. There is no CE standard to certify this device to.
For more information, visit the Notch Flow Rope Wrench product page and check out the user guide.